Auto-Import Transactions with QuickBooks Desktop Bank Feeds
Are you tired of manually entering bank transactions? QuickBooks Desktop has a tool called Bank Feeds that links your bank account to QuickBooks and automatically imports your transactions. It saves you time and helps keep your financial data accurate. Let’s explore what Bank Feeds can do for you and how to get started.
What Are Bank Feeds?
Bank Feeds is a feature in QuickBooks Desktop that connects your bank account directly to your QuickBooks company file. Instead of entering each deposit, check, or purchase yourself, Bank Feeds automatically pulls this information from your bank. You then review, match, and add each transaction to your QuickBooks records.
Why You’ll Love It:
- Faster Data Entry: Most of your bank activity appears in QuickBooks without manual effort.
- Fewer Mistakes: Reduces errors that can happen when you enter transactions by hand.
How to Turn on Bank Feeds
- Check Your Bank’s Compatibility: Many banks in the United States support QuickBooks Desktop. You can confirm this by checking your bank’s website or looking inside QuickBooks for a list of available banks.
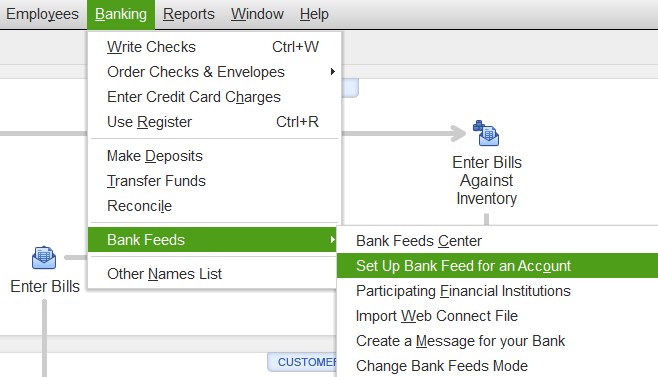
- Open Bank Feeds Setup: Go to Banking > Bank Feeds > Set Up Bank Feeds for an Account in QuickBooks Desktop.

- Choose Your Bank and Enter Details: Choose your bank from the list and enter your login information. QuickBooks will securely connect to your bank’s website.
- Link to the Correct Account in QuickBooks: Pick the account that matches your real bank account. This ensures transactions end up in the right place.
Reviewing and Accepting Transactions
After you’ve set up Bank Feeds, QuickBooks can download your recent transactions. Here’s how to review and add them to your books:
- Download Transactions: Go to Banking > Bank Feeds > Bank Feeds Center. Click Download Transactions to get the latest data from your bank.
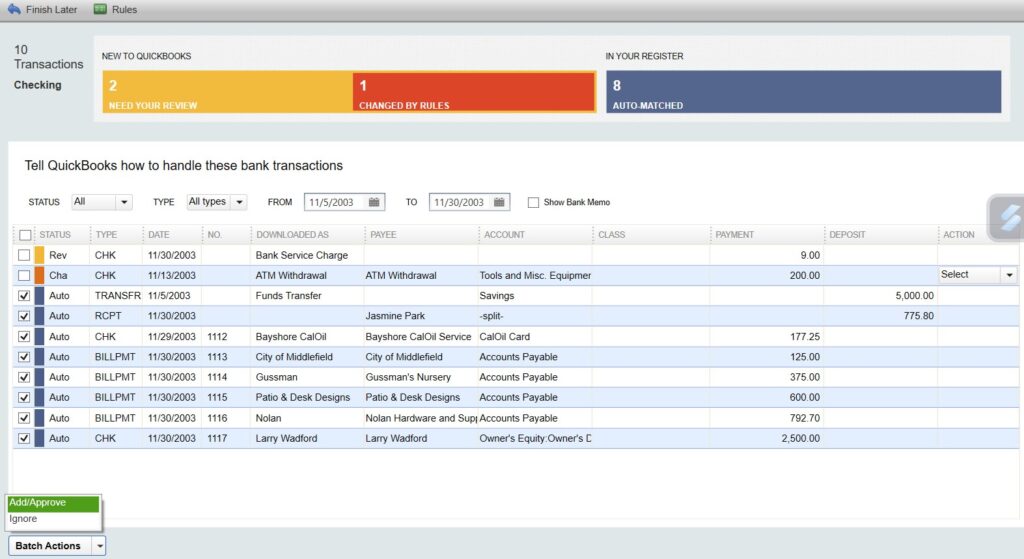
- Match or Create Transactions: QuickBooks will try to match new downloads to existing records. If it finds a match, you can approve it. If it’s a new transaction, label it with the proper category (such as “Utilities” or “Office Supplies”) and add it.
- Confirm and Add to Register: Confirm the transaction once you have matched or assigned a category. QuickBooks moves the transaction into your bank account register.

Tips for Success
- Reconcile Regularly: This helps you spot errors, such as missing or duplicate transactions or anything else that isn’t quite right with your accounting.
- Create Rules: To save time, create rules. For example, if you often buy from the same supplier, you can set a rule so QuickBooks automatically labels that expense correctly in the future.
- Check for Bank Fees: Check for any charges your bank might have for using direct connections to QuickBooks. Some banks offer free access, while others might charge a small monthly fee.
- Stay Secure: Always protect your login details. If you change your password with your bank, update QuickBooks as well to keep the connection working smoothly.
Give Bank Feeds a try, and watch your manual data entry shrink. That means less time crunching numbers and more time focusing on what truly matters—growing your business!
