There’s a surprisingly simple truth behind many thriving businesses: not everything you do carries the same weight. That’s the idea behind the 80/20 rule in business, where roughly 80% of your results come from just 20% of your efforts.
The 80/20 Rule—also known as the Pareto Principle—suggests that roughly 80% of your results come from just 20% of your efforts. It might not be exact, but you’ll be amazed how often it shows up once you start paying attention.
How does this actually show up in your business?
A handful of clients likely generate the majority of your income
One or two services may be consistently bringing in new business
Certain tasks move things forward, while others just keep you busy
Once you start spotting these patterns, you can shift your focus toward what’s really working.
Focus on What’s Already Working
Start by identifying your top 20%. These parts of your business consistently deliver value—whether it’s clients who pay on time and refer others, or service packages that are efficient and profitable. Once you know what’s working, you can focus more time and energy there.
Trim What’s Not
Chances are, some things are draining your time and energy without giving much in return. Maybe there’s a service that’s started to feel like more trouble than it’s worth. Or a client relationship that takes more energy than it gives back.
The 80/20 mindset gives you permission to pause, take a step back, and make thoughtful adjustments—especially when something no longer aligns with your goals.
Not Just About Money
This principle can help with everything from time management to stress levels. You may find that most of your weekly stress stems from one or two tasks. That insight alone can help you delegate, automate, or eliminate more strategically.
Try This:
Review your client list—who are your top contributors?
Track your time for a few days—where do you see return, and where does it disappear?
Look at your services—what feels profitable and sustainable?
Even one small shift can free up space for deeper, more impactful work.
Want to dig a little deeper? We’ve put together a simple worksheet and companion guide to help you apply the 80/20 Rule to your own business—no guesswork needed. It’s an easy way to take what you’ve just read and turn it into something practical you can use.
Do you have a regular schedule you follow with your QuickBooks Online work?
Whether you’re a new QuickBooks Online user or a long-time user, having a regular accounting routine can make you more productive and confident that you’re addressing all of your accounting issues.
What Should You Do Every Day?
Even if you don’t have expenses to enter or invoices to process, it’s a good idea to log into QuickBooks Online every day. If you’ve connected your online bank and credit cards to the site (which you absolutely should), there will probably be transactions to go over. So after you’ve taken a look at your Dashboard (especially your Tasks), hover your mouse over Transactions in the toolbar and click Bank Transactions.
Click Update in the upper right to make sure you’re seeing the most recent transactions. If you’re doing this every day, it shouldn’t take long to go over the income and expenses that have been imported since you last logged in.
You should be looking at newly imported transactions daily and completing the fields provided as comprehensively as possible.
If you don’t know what Match or Record as transfer mean, we should schedule a session to go over how those work to avoid duplicate transactions in QuickBooks Online.
Every Week
You need to be monitoring your accounts receivable and payables on a weekly basis – at minimum. There are two ways to do this. You can:
Run reports
Click Reports in the toolbar and scroll down first to Who owes you. Run Accounts receivable aging summary. QuickBooks will display past-due transactions in several columns (Current, 1-30 days, 31-60 days, 61-90 days, and 91 and over). If you’re keeping up with your receivables, you shouldn’t be seeing numbers in most of the columns, unless you’re in a known collections process.
Scroll down to What you owe and run Accounts payable aging summary. This works like the aging receivables report. Again, you shouldn’t be seeing much activity here unless you’re in a payment dispute with a vendor.
You can also run the Open Invoices report to quickly see the Due date and Open balance entries here. Ditto the Unpaid Bills report.
Consult the All Sales page
Hover your mouse over Sales in the toolbar and click All Sales. The colored bars and numbers at the top of the page show you the status of your sales. Click the orange bar in the middle to see a list of overdue invoices. If there are any, you can set a Send Reminder by clicking the corresponding down arrow in the Action column. While you’re there, look at estimates and unbilled income and take any action needed.
Every Two Weeks (or more often, depending on product volume) If you sell products and track inventory in QuickBooks Online, you should keep a close eye on your stock to see if you need to:
Reorder,
Bring in a larger supply because something is selling well, or,
Discount or discontinue a product because it’s not selling.
Click Reports in the toolbar and run Product/Service List under Sales and Customers and look at the Quantity on Hand column.
Every Month
Reconcile your accounts (Transactions | Reconcile)
It’s really important that you reconcile your accounts every month.
No one likes to do this, but it’s way easier to do regular reconciliations than it is to have to go back several months to track down a problem. If you’ve never done this in QuickBooks Online, it works similarly to how you used to reconcile your accounts by comparing a bank statement and your paper checkbook register. Only you’re comparing your bank or credit card statements to your accounts in QuickBooks Online. Before you start, make sure you’ve matched and categorized all of your downloaded transactions.
Run a Profit and Loss report for the last month
Click Reports in the toolbar and click Profit and Loss under Business Overview. Did you make a profit last month?
Every Quarter
If you’re planning to apply for a loan or looking for an investor, or if you just want a deeper understanding of how your business is doing, consider having us create and analyze standard financial reports for you, like the Balance Sheet and Statement of Cash Flows.
Lastly, If you ever have trouble categorizing an expense, select Ask My Accountant as the Category. If we’re meeting with you once a month, we can run a report on these and help you categorize them correctly.
Give the above a try, review your results, and adjust the schedule as necessary to ensure all your accounting tasks are completed.
If you’re still manually entering your banking and credit card activity into QuickBooks Online, we suggest you consider setting up connections to your online bank and credit card accounts. Once your transactions are delivered to QuickBooks Online, the site provides tools that allow you to view them and make sure they’re complete before you record them.
Here are step-by-step instructions to how this all works.
Making a Connection
In order to do this, you’ll need to have set up a username and password for your online bank/credit card accounts. In QuickBooks Online, click Transactions | Bank transactions. Click Link account over to the right.
A page opens with suggested financial institutions. If yours isn’t there, enter it in the search field at the top. If there are multiple options, be sure to select the correct one and click it.
If your bank isn’t listed on the page of options, enter its name, and then click on the correct one if there’s more than one entry.
Click Continue and go through any of the security steps your financial institution may have. You’ll get to a page that says, Which accounts do you want to connect? A drop-down list displaying options from your Chart of Accounts will appear. Select the type of account you’re creating (checking, credit card, etc.) and continue to follow the onscreen instructions until your connection is complete and QuickBooks Online has downloaded your transactions.
WARNING: It’s important that you set up your linked accounts correctly since you’re dealing with the Chart of Accounts. If any step is confusing, we can schedule a session to go over online account connections with you.
Bank Transactions Page (Feed)
Once you’ve connected to all your online accounts, you’ll see that they appear on the Bank transactions page, displayed in small boxes containing their balances and the number of transactions they contain (there might be quite a few when you first download). You can also see how recently each account was updated (click Update anytime you want to refresh an account).
Once you’ve connected to an online bank account, you can see how many transactions were downloaded and what its balance is.
Click one, and its register will appear below. Above that, you’ll see three labeled bars:
For review. QuickBooks Online puts all downloaded transactions in this list.
Categorized. Your transactions will move to this list after you’ve assigned categories to them.
Excluded. If you happen to run into duplicate transactions, you can move them here.
Below that, you’ll see that you can filter your transactions by date, by type, or by description, check number, or amount.
WARNING: As you continue to work with accounts, you may occasionally find that a connection has been unlinked. When that happens, just repeat the connection process again.
Working with Individual Transactions
You’ll want to set some time aside the first time you download transactions so you can look at each one and add or edit its content. Click one to open the detail box, as shown below. The top line defaults to Categorize. First, select the correct Vendor/Customer (or + Add new), then check the Category and change it from the drop-down menu if it’s incorrect.
You can add or edit a lot of details for your individual transactions.
There’s one more field here that’s very important. If you’re purchased something on behalf of a customer, be sure to select the correct one from the drop-down list under the Customer field and click the Billable box. QuickBooks Online will make this transaction information available to you the next time you invoice the customer. Other fields in the above image are optional, like Tags, Memo, and Add attachment. When your transaction is complete, click Confirm to move it to the Categorized list. The transaction is now posted in QuickBooks.
There are two other options in these individual transaction boxes besides Categorize: Find match and Record as transfer.
Categorize: Find Match
When you use “Find Match,” QuickBooks is looking for a transaction that’s already been entered in your records, such as an invoice you’ve received payment for or a bill you’ve paid.
For example:
Let’s say a customer paid you $500, and you already entered that payment as “Received Payment” in QuickBooks.
When the $500 deposit shows up in your bank feed, you use Find Match to connect that bank transaction to the existing record in QuickBooks.
Record as Transfer
The “Record as Transfer” option is used when you’ve moved money between your own bank accounts, like from your checking account to your savings account.
For example:
If you transferred $1,000 from your business checking to your business savings account, you wouldn’t categorize it as income or expense—it’s just moving money within your accounts.
In this case, you use Record as Transfer to note that the transaction isn’t new; it’s just moving money between accounts.
Why These Options Matter
Find Match ensures your books match what’s in the bank without creating duplicate entries.
Record as Transfer keeps things clean and avoids accidentally categorizing your own money movements as income or expenses.
Setting up and using the bank transaction feed can feel overwhelming at first, but with practice, you’ll become more comfortable over time. If you’re feeling unsure, don’t hesitate to reach out to us for assistance. We’re here to help you set it up and guide you through the learning process to ensure you’re on the right track.
As a business owner or accounting professional, staying on top of financial data is critical for making informed decisions. QuickBooks Desktop offers a powerful tool to help with this: Scheduled Reports.
Scheduled Reports allow you to automate the delivery of financial reports directly to your inbox—or to your team’s inbox—on a recurring schedule. Instead of manually running and sharing reports every week or month, this feature ensures that your financial information is consistently delivered on time, without any extra effort.
This automation can be helpful for businesses with tight schedules or multiple partners.
To start using this feature, ensure QuickBooks is setup to email reports. To verify, go to Preferences, under the File menu, and select Send Forms. Under the My Preferences tab, click the Add button to setup your email if needed.
Customize Reports
Before scheduling reports to be sent automatically, customize the reports to meet your specific needs.
When you first run a report in QuickBooks, it displays with default settings. To adjust the report, click Customize Report in the upper left corner of the report window. Modify the Display and Filters to include the data you want. Once you’ve finished customizing, click OK to run the report with your updated settings.
You can customize QuickBooks reports to see just the data you want.
Memorized Reports
After clicking OK, click Memorize in the toolbar. In the window that opens, enter a descriptive name so you’ll recognize it later. If you want to save the report to a group (optional), check the box and select a group from the menu, such as Company or Customers, etc. Click OK to save your changes.
To find a memorized report, open the Reports menu and highlight Memorized Reports. Find your report in the list and click on it.
Scheduled Reports
Access the schedule reports by going to the Reports menu, select Scheduled Reports, and Schedule Setup. The following window will open:
Click Get Started then setup the schedule frequency (weekly, monthly, etc.) and delivery method. Save the schedule and confirm it is active.
Additional Notes
While this feature can save time if you frequently email reports, keep the following points in mind:
QuickBooks Desktop needs to be open at the time reports are scheduled to run.
If you need slightly different reports or need to send emails to various recipients, you will need to setup multiple customized reports and email templates.
If a report is scheduled without regular review, there is a risk of sending out outdated or incomplete information.
There are potential security risks, such as issues with encryption (consult your IT or email provider) and the risk of emailing sensitive financial data.
By understanding these limitations, you can take proactive steps to mitigate risks and ensure Scheduled Reports work effectively for your business. If these drawbacks are a concern, consider alternative third-party solutions to assist you in sending out scheduled reports.
A recurring payment is an invoice or sales receipt that automatically repeats on a schedule you choose—weekly, monthly, quarterly, or any frequency you need. When you set up a recurring payment, QuickBooks Online handles the repetitive work. You decide on the details and schedule; the program will do the rest.
This article will focus on automatic payments when you have the customer’s payment information on file. If you would like to learn how to set up a recurring customer invoice, read this article.
Step-by-Step Guide to Creating a Recurring Sales Receipt Transaction
Go to the Gear Icon in the upper-right corner of your screen.
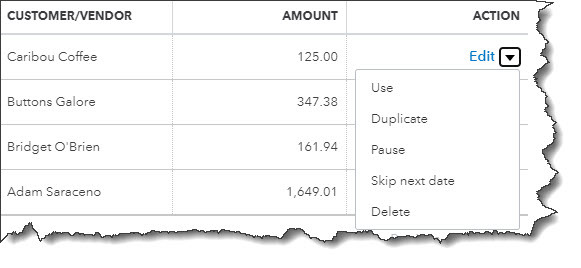
Under the list menu, select Recurring Transactions. This will bring up a list of all your recurring items.
Click New in the top right corner to create your new recurring transaction.
Choose the Sales Receipt for the transaction type if you charge your customer’s card/bank account automatically (using QuickBooks Payments or another payment processor).
Name Your Template with a familiar name, like “Customer ABC Company Monthly Service Fee.” This will help you quickly find it later if you want to make changes.
Select Scheduled for the Type if you want QuickBooks to create, process, and send the receipt repeatedly automatically.
Set the Interval and Start/End Dates in the Interval section. In the Interval section, select how often you want the transaction to repeat (e.g., daily, weekly, monthly). Enter the Start Date (the first date you want this transaction to begin) and, if necessary, an End Date (the last date you want to charge them). You can leave this section blank or choose None if there’s no end date.
Select the Customer from the list and enter the Products/Services you’re charging for, the Rate, Quantity, and other relevant details. If needed, add discounts or Sales Tax (depending on your local rules).
Save the Template after double-checking your information for accuracy.
Tips for Success
Verify payment details to seeif you’re processing payments automatically.
Keep Customer Information Updated so receipts go to the right person or email address.
Review from Time to Time to ensure correct pricing, products, and services.
Automating these transactions minimizes errors and reduces the chance of forgetting to process your customers’ payments. Creating recurring payments in QuickBooks Online is straightforward, saves time, and improves cash flow.