As you are going about your day, it is easy to be pulled in multiple directions. Having a regular bookkeeping routine can help you stay on track.
Here are some best practices when using QuickBooks Online.
Go through your new transactions regularly
One of the best things about QuickBooks Online is its ability to connect to your bank and credit card accounts and import transactions regularly. However, this feature is only useful if you review your recently downloaded transactions regularly. We recommend a minimum of once a week as it might become overwhelming if you wait much longer than that.
To view an account register, click Banking in the left vertical pane, and then click on the desired account at the top of the screen. Select a transaction and a small window like the (partial) one pictured above, displays your options.
Always assign categories to expenses
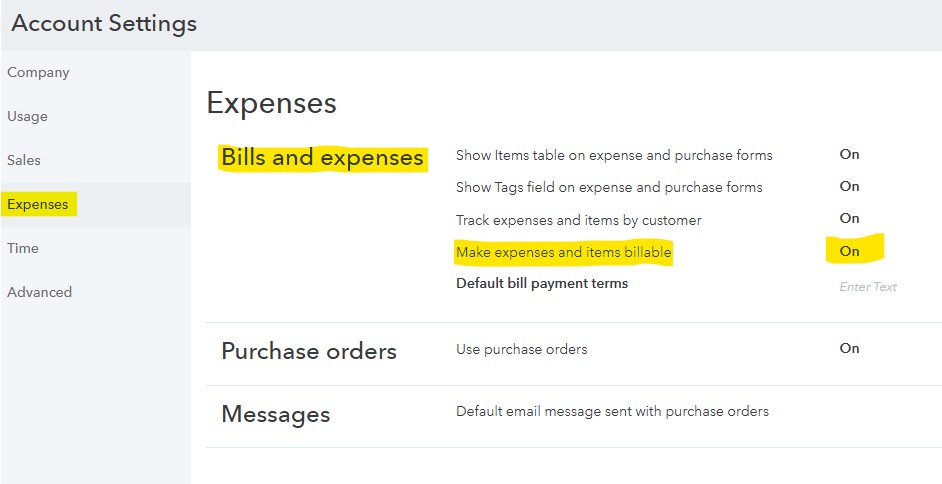
Entering detail information in QuickBooks Online will produce helpful your reports. It is especially important that you assign categories to expenses and mark them as billable or not. Those categorized expenses will be very important as you are preparing your company’s income taxes and ensures customers are invoiced for expenses you incur on their behalf.
Run aging reports on a weekly basis
QuickBooks Online can help you keep up with money owed to you as well as what you owe to others.
We recommend you run at least two reports weekly: Accounts Receivable Aging Summary and Accounts Payable Aging Summary. You can modify these reports by clicking the Customize button if needed, but they should be good as is. You do not want to see any numbers in any columns except the first one (Current). If you see any beyond that, it means that either incoming or outgoing payments are overdue. Click on any number to see the transaction(s) detail.
Set reorder points on inventory items
Keep an eye on your product inventory levels. When you create an item record (Sales | Products and Services | New), be sure to enter a Reorder point. The Products and Services page tells you how many items have Low Stock or are Out of Stock. You can also see the Qty on Hand and Reorder Point in the table below those numbers.
More to Implement
We also recommend other best practices and we will expand upon those in a later article but for now, believe these are a good starting point.
Learning any new piece of software can be challenging. Add a complex process like accounting, and you may feel apprehensive about your ability to learn how to use it.
While QuickBooks was designed for small businesses, focusing on forms and keeping the accounting jargon to a minimum, it is important to manage expectations that you might not be able to simply jump into the software and complete your accounting tasks.
Here are some suggestions below that will help you become more familiar and confident in using QuickBooks.
Open a sample file
While you are exploring QuickBooks, it is a good idea to work with a sample file. That way, you can look around and practice without risking compromising your company file. You will be able to see how completed records and transactions should look and try your hand at entering sample data of your own.
Before you open a sample file, you might need to close your current company. Click on File in the upper left to open that menu, then select Close Company. A window will open that should have your company file in its list. Below that, you will see three boxes containing different options. Click on the down arrow next to Open a sample file, as pictured above (this may look slightly different in your version). Choose the one you want to open and click on it. QuickBooks will load again with that file open. When you are done looking at the sample file, go to File | Close Company again. The No Company Open window should appear again. Click on your company file name and then on Open to return to your own file.
Learn where your lists are
You will be storing a great deal of information in lists. For example, when you create a record for a product or service you sell, it goes into a master list that you can access by opening the Lists menu at the top of the screen and clicking on Item List. You’ll also open the Lists menu when you want to add options to an existing type of list, like Class List (QuickBooks allows you to assign Classes to transactions so you can group related information, like departments or locations for example).
Try a Transaction
Sales receipts and invoices are two sales transactions you will probably want to get familiar with first. QuickBooks comes with templates that resemble these sales forms’ paper counterparts. You simply fill in the blanks by entering data and selecting options from drop-down lists. Open the Customers menu and select Create Invoices. Click the back arrow above Find in the upper left corner to see sample invoices. Then click the right arrow to get back to a blank form and create an invoice by clicking the down arrows in blank fields to see your sample lists.
Tip: If you would like a greater overview of sales receipts and invoices, please reference this article.
Explore Snapshots
Once you start entering records and transactions, you will want to be able to access that information in ways that provide insight on how your company is doing. You will eventually start running reports in QuickBooks, but the software also accomplishes this through its Snapshots. There are three of them, and they all provide these overviews by using data tables and charts. Open the Company menu and click on Company Snapshot, then click the tabs to move between Company, Payments, and Customer. You will learn how QuickBooks provides real-time information about your finances.
Look at the Income Tracker
It is easy to see the status of your invoices (and estimates) in QuickBooks. Open the Customers menu and select Income Tracker. Colored bars at the top of the screen show you what is outstanding and what has been paid. A list of the related transactions appears below these bars.
As we said earlier, QuickBooks can be overwhelming when you first start to use it. We can ease that transition by providing training and consulting on the best way to use QuickBooks.
Tip: We cannot stress enough the importance of having your QuickBooks set up correctly and learning how accounting transactions move through the software. Every entry entered into QuickBooks posts to multiple accounting reports. You want to be able to rely on your reports to make necessary decisions about your business as well as file your annual taxes.
New year, new challenges, and the potential for new successes. Here are five ways you can improve your financial management in the new year.
If you are already using QuickBooks Online, you know how it has solved the paperwork confusion of the past. However, are you taking advantage of all of its capabilities? As you turn your digital calendar to January, consider expanding your use of the software to set yourself up for success in the upcoming year. Here are five features to explore if you have not already.
Practice Proactive Reconciliation:
QuickBooks Online Banking screen display registers for the bank and credit card transactions that have been posted by your banks. Do you review these regularly? It will save time when you do your monthly reconciliations with your bank statements. Hover over Transactions in the toolbar and select Banking. You can see some of your transaction management options in the image below.
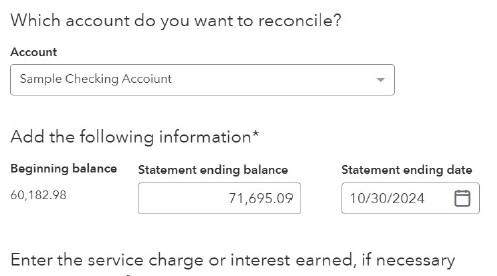
When your statement comes and you are ready to reconcile, you can use QuickBooks Online tools that take you step by step through the process. Hover over Accounting in the toolbar and select Reconcile. Let us know if you need help with reconciliation or with managing downloaded transactions.
Start Accepting Online Payments:
This is probably the #1 way to encourage customers to pay you faster. When you set up a merchant account through QuickBooks Payments, you are be able to accept credit cards, debit cards, and ACH bank transfers. Your invoices will include a Pay Now button and will contain the information your customers need to pay electronically. Their funds will go into your bank account.
There are other ways they can pay you directly. You can take their card numbers over the phone. You can also get a free card reader from Intuit and swipe their cards on your mobile device. And you can set up recurring payments that will occur automatically.
Tip: We work directly with Intuit to offer QuickBooks Payments. Intuithas very affordable monthly rates and completive swipe and key rates. Adding QuickBooks Payments to your offerings can save steps in recording payments in QuickBooks. You send an invoice via email and offer ACH or credit card as payment options. Your customer will click on a button in your email to make a payment and QuickBooks will know which invoice it is for and QuickBooks and will link the payment to the appropriate invoice.
Set Weekly and Monthly Report Schedules:
You may run reports in QuickBooks Online on a monthly basis. Some reports, though, should be created more frequently, like Accounts receivable aging (detail or summary), Accounts Payable Aging, Open invoices, and Unpaid Bills. These reports help you keep a close watch on what you owe and who owes you.
It is important to run some other reports on a monthly basis, including Balance Sheet, Profit and Loss, and Statement of Cash Flows. Rather than just providing snapshots of where you stand with money coming in and going out, they give you a more comprehensive view of your finances that can help you make better business decisions. They are complex and often difficult to analyze, though, which is why QuickBooks Online categorizes them as For my accountant. While they are categorize under the Accountant group we recommend you view them at least monthly and if you need help interpreting them let us know.
Expand QuickBooks Online Features by Using Apps:
QuickBooks Online is generic enough that it can be used by a wide variety of small businesses. But that flexibility may mean that, it is not quite robust enough in one area or another, like inventory management or time tracking. Check out the hundreds of apps that can integrate with QuickBooks Online to fill in the gaps by clicking on APPs in the toolbar. Again, we are available to help if you need assistance in choosing the right app for your business.
Evaluate the Cost-effectiveness of Your Vendors:
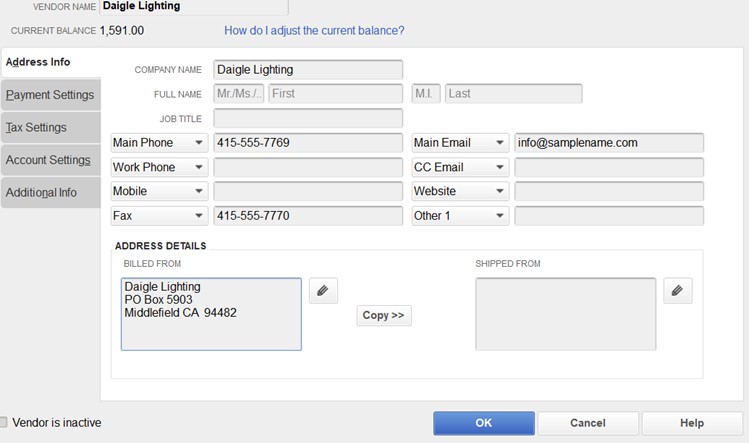
It is easy to stick with the same old suppliers because it is a hassle to change. However, it is good to review the pricing of your current vendors and compare to other vendors to make sure you are getting the best pricing as well as customer service. To review your vendor list, hover over Expenses in the toolbar and click on Vendors. As you are reviewing the list, this might be a good time to clean up dated information. Click the down arrow at the end of each row and select Make inactive if you haven’t ordered from specific suppliers over the last year.
As we said earlier, we are available to meet with you and explain any of the concepts discussed here in more depth. Best wishes to you in the new year!
Recording payments, whether they come in for an invoice you sent to a customer (recorded via the receive payment feature) or you issued a sales receipts for an in person sale, you will have to deal with posting the deposit into QuickBooks.
By default, QuickBooks posts payments received into an account called Undeposited Funds. You can see it in your Chart of Accounts by clicking the Chart of Accounts icon on QuickBooks home page and scrolling down a bit. Look over to the end of the line and you will see its current balance. This holds your payments until you record them as deposits and take your money to the bank.
When you are getting ready to take cash and checks to the bank, click the Record Deposits icon on the home page. The Payments to Deposit window will open.
We recommend completing your physical deposit slip first; based on the checks and cash you have in hand. Then, match them to payments in the window pictured above. You can click in front of each one you have matched to create a checkmark. When you have finished, click OK. The Make Deposits window will open. Make sure that the account you want to Deposit to is showing in the upper left corner. You can add a Memo and change the Date if needed.
The total for your handwritten deposit slip and the final tally in the Make Deposits window should be the same. This will ensure that the amount deposited in your bank account will match the bank deposit amount in QuickBooks when reconciling. If you have leftover cash or checks, you will need to track down their origins and create new transactions.
Time Saver Tip: To save steps in recording payments in QuickBooks consider adding QuickBooks Payments to your offerings. You can send an invoice via email and offer ACH or credit card as payment options. Your customer will click on a button in your email to make a payment and QuickBooks will know it is linked to the invoice and post the payment to the appropriate invoice. Time saved on data entry! QuickBooks Payments has very affordable monthly rates of $0 – $19.95 and completive swipe and key rates. Reach out to us if you would like to learn more.
Checking Your Work
It is a good idea to check your Undeposited Funds account occasionally to make sure that you have not left money undeposited. To do this, open your Chart of Accounts. Right-click Undeposited Funds and click on QuickReport: Undeposited Funds. All should be selected in the Date field in the upper left. Click on Customize Report and select the Filters tab. Scroll down in the Filters list and click on Cleared. Select No and click OK to display your report.
Working with Payment Methods
QuickBooks comes with a default set of payment methods. You can add to these and/or make existing ones inactive, so they do not clutter up the drop-down list. Open the Lists menu and select Customer & Vendor Profile Lists | Payment Method List. If you do not accept, Discover cards, for example, right-click on that entry and select Make Payment Method Inactive. To add one, click the down arrow next to Payment Method and then New. The Payment Method should match the Payment Type.
Using the methods above will make reconciling your checking account at month end go more smoothly as all your deposits are accounted for and they match to your banking statement.
There are features in QuickBooks that can remind you of important accounting tasks coming up and avoid having them slip through the cracks.
Setting Up Reminders
Before you start using the reminders feature, you will have to set up this feature. Open the Edit menu and select Preferences | Reminders. This window will open:
This window should open to the My Preferences screen. Click the box in front of Show Reminders List when opening a Company file to place a checkmark. Then click Company Preferences. You will see a list of QuickBooks tasks, such as Checks to Print. You can tell QuickBooks how many days in advance you would like to be reminded about this pending activity by entering a number in the box in front of days before check date. You can also request that this appear in either Summary or List form. If you do not want to be reminded about any of them, click the button below Don’t Remind Me. When you are finished modifying the reminders, click OK.
The next time you open QuickBooks, your reminders will appear in a window on top of your home page. When you double-click on one, the task will open.
To Do Form
Two icons in the upper right of the Reminders screen open your Preferences and a blank To Do form. Here, you can schedule a call, task, appointment, etc. and associate it with a customer, vendor, or employee if desired. This item will then appear in your Reminders list.
Calendar View
QuickBooks’ Reminders are not the only way you can ensure that you are staying current with your accounting tasks. You can use the Calendar to see what you have scheduled and have accomplished on a daily basis.
As you did with Reminders, visit this tool’s Preferences page (Edit | Preferences | Calendar). Here, you will only need to work with the options under the My Preferences tab. You can choose from among a Daily, Weekly, or Monthly view, or just have QuickBooks Remember last view. Your calendar can display your choice of a Weekly view: a Fixed view of 5 or 7 days or a Variable view of 5/7 days. You can also show All Transactions, To Do, Transactions Due, or choose one type of transaction (Invoice, Sales Receipt, Bill, etc.).
You can also define Upcoming and Past Due Settings. You can Hide or Show these, Show only if data exists, or remember the last settings. QuickBooks allows you to choose the number of days’ worth of data that will be displayed for both Upcoming data and Past due data.
You can open the Calendar any time from the Company menu, by clicking a link in the Toolbar or the Calendar Icon on the Home Page. You will see the calendar in the View you selected. Each day where there’s been-or is scheduled to be-activity will show either Due or Entered, with the corresponding number of transactions in parentheses. Below that is a list of Transactions Entered; you can double-click on any of them to see the actual transaction form.
A list of upcoming and past due transactions appears in the right vertical pane. Fields and buttons at the top of the screen allow you to change the View and limit the list to a specified type of transaction. (This is helpful if you want to focus on a specific type of task such as paying bills, customer invoices, etc.) You can also add To Do’s from this page.
We recommend trying out the reminder and calendar features to assist you with staying on top and streamlining your accounting tasks.