How to Use Job Costing in QuickBooks Desktop to See What Projects Really Earn
If your business handles projects, jobs, or client-specific work, you’ve probably asked yourself: “Am I actually making money on this?” That’s where job costing in QuickBooks Desktop comes in.
Job costing helps you track all the income and expenses tied to a specific job or project so you can clearly see what’s working — and what’s not. Whether you’re a contractor, consultant, or creative, understanding your job profitability can help you quote smarter, manage costs better, and grow your bottom line.
Let’s walk through how to set it up and use it in QuickBooks Desktop.
What is Job Costing in QuickBooks Desktop?
Job costing is the process of tracking income and expenses by individual jobs or projects instead of just lumping everything together. This gives you a clear view of what each job truly costs you — and how profitable it is.
Think of it like this: Instead of just knowing how much you spent on materials last month, you’ll know exactly how much you spent for Client A’s kitchen remodel. That kind of detail is what helps you stay in control and profitable.
How to Set Up Job Costing in QuickBooks Desktop
Here’s a simple step-by-step guide to getting started:
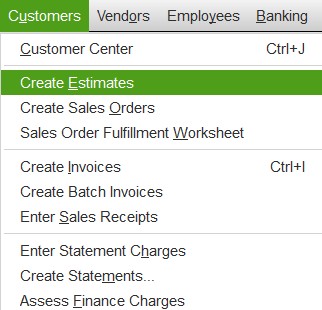
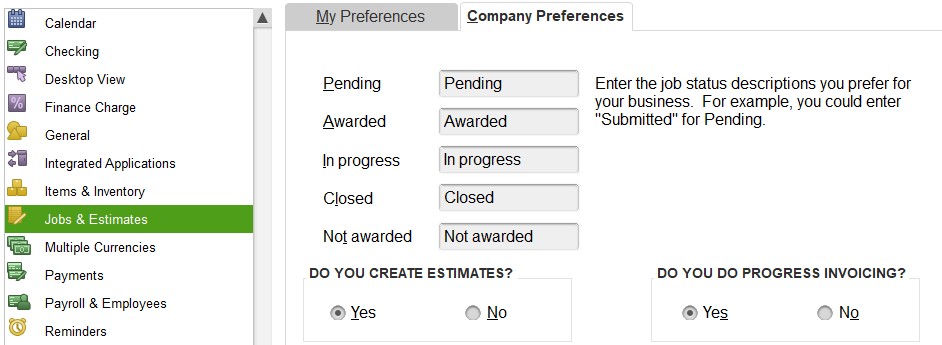
1. Turn On Job Costing Features
- Go to Edit > Preferences > Jobs & Estimates.
- Under the “Company Preferences” tab, make sure progress invoicing and estimates are turned on.
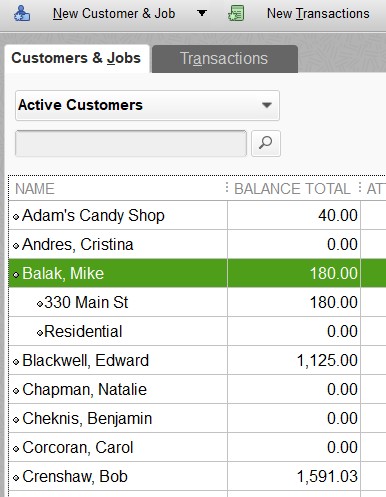
2. Create Customers and Jobs
- Use the “Customers & Jobs” list (located in the Customer Center) to set up each client and add individual jobs underneath them.
- Example:
- Customer: Mike Balak
- Job: Utility Shed
- Example:

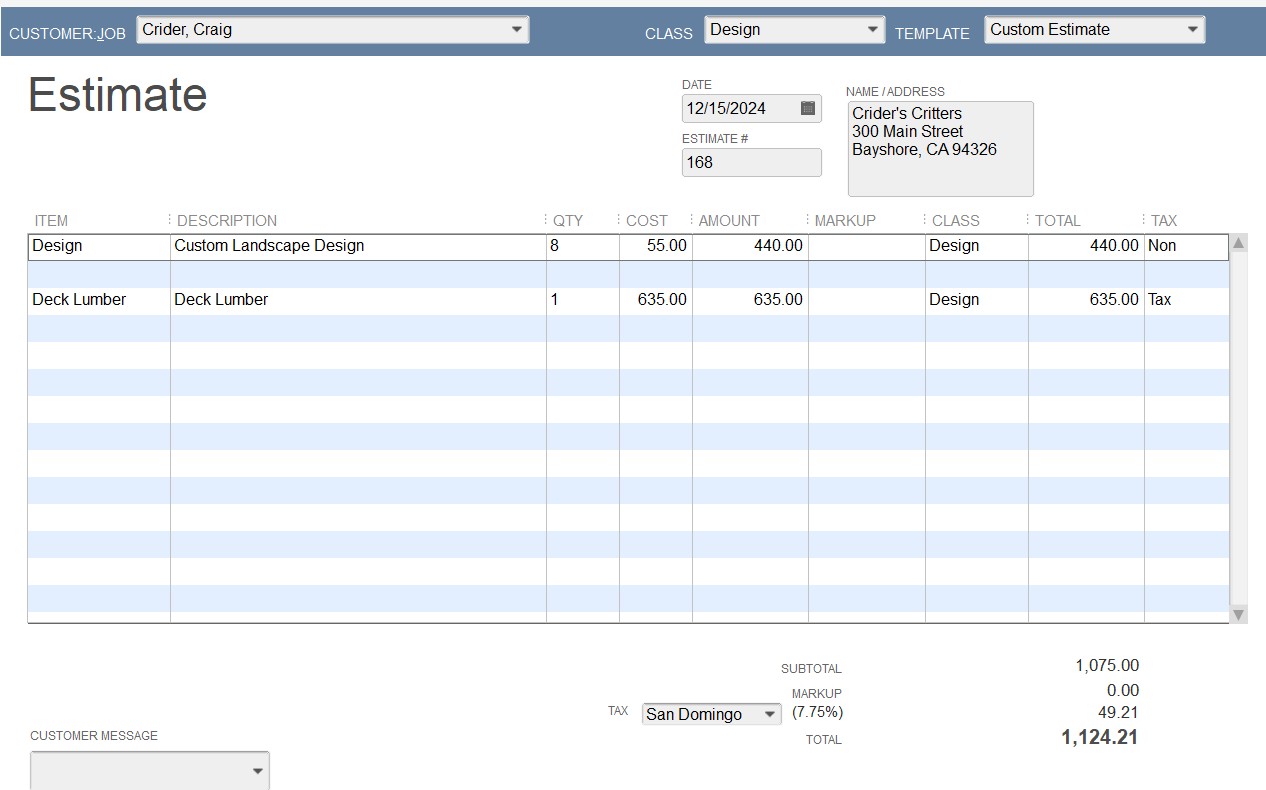
3. Assign Costs to Jobs
- When you enter bills, checks, or expenses, use the “Customer:Job” column to link each cost to the correct job.
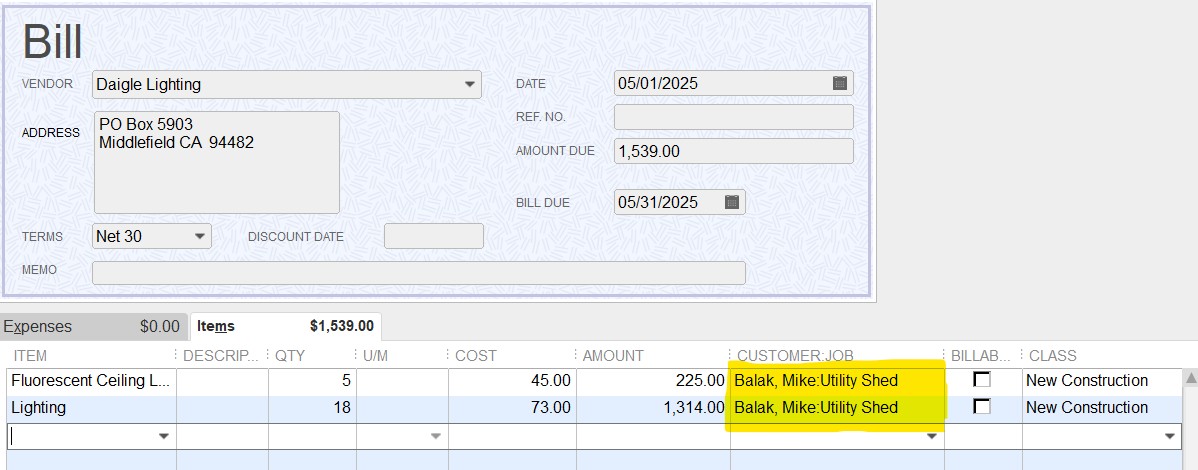
- The same applies when recording employee time — always assign it to the job if it applies.
Tip: Keep job names short and clear so they’re easy to find in reports.
Tracking Costs Accurately
Once setup is complete, your job is to stay consistent:
- Every expense — from materials to subcontractors — should be linked to the correct job.
- If you track employee time, use the Weekly Timesheet or Time/Enter Single Activity window to assign hours directly to jobs.
- Don’t forget to capture smaller costs like travel or job-site rentals. They add up!
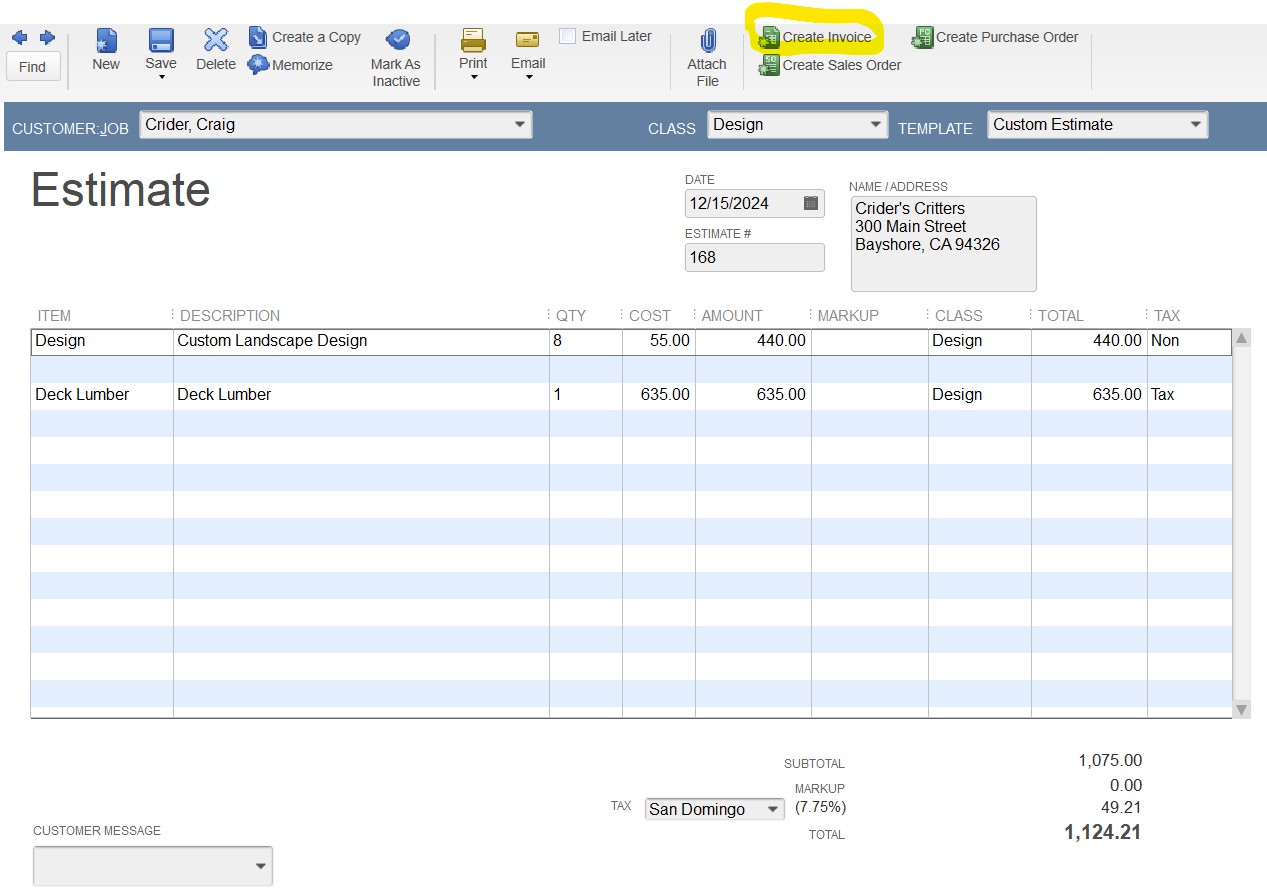
Recording Income to the Right Job
Just like expenses, your income needs to be tied to the correct job to get accurate profitability reports.
- When creating Invoices or Sales Receipts, always select the correct job in the “Customer:Job” field — not just the main customer.
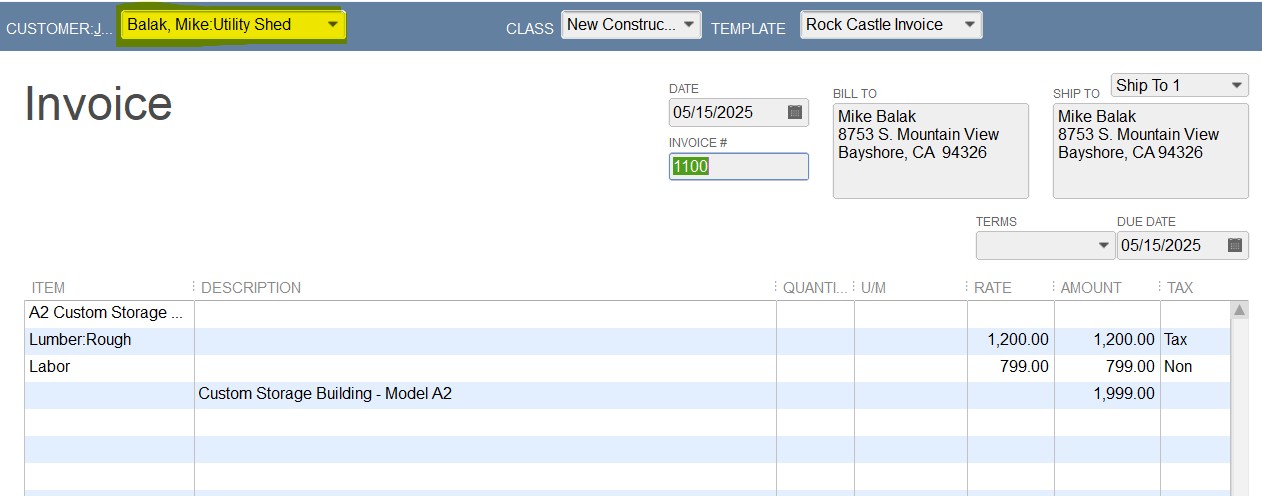
- If you’re billing for time or materials, make sure the billable items are linked to the job as well.
- Using the correct job helps ensure that the income shows up on your job profitability reports and gives you a full picture of how each project is performing.
Tip: Double-check the job name before saving an invoice — it’s an easy step that makes a big difference.
Helpful Job Costing Reports in QuickBooks Desktop
Here are a few reports that give you powerful insights:
- Job Profitability Summary – Shows profit margins for each job.
- Job Profitability Detail – Breaks down each income and expense item.
- Estimates vs. Actuals – Helps you compare what you planned versus what actually happened.
You can find these reports under:
Reports > Jobs, Time & Mileage
Spend a few minutes reviewing these reports regularly — they’ll tell you where things are on track and where adjustments are needed.
Why Job Costing Helps You Make Smarter Decisions
Once you’ve been using job costing for a while, you’ll start to notice trends:
- Which jobs are the most profitable?
- Where are you losing money?
- Are your estimates accurate?
- Which clients or job types should you pursue more often?
Once you start seeing patterns in your reports, it becomes easier to price future jobs, adjust how you work, and steer clear of unexpected issues.
Final Thoughts
Not assigning transactions to specific jobs means you could be missing some key details about your actual project costs. The good news? Job costing in QuickBooks Desktop is less about complexity and more about staying consistent with how you enter information.
Start with one active job and begin linking your income and expenses. Once you see the results in your reports, you’ll wonder how you ever managed without it.