Simplify Bills & Payments: QuickBooks Desktop Vendor Center
Keeping track of bills and payments can be overwhelming, especially if you’re juggling multiple vendors. QuickBooks Desktop offers the Vendor Center as a single, convenient location to organize everything you owe—and what you’ve already paid. This feature not only streamlines your records but also gives you a clear view of your business finances. Below, we’ll explore how the Vendor Center works and why it’s a must-use tool for staying organized.
What Is the Vendor Center?
The Vendor Center in QuickBooks Desktop is a central hub that contains all the information you need about the people and companies you pay. Think of it like an address book for your business finances. Instead of juggling separate spreadsheets, files, and folders, you can manage all your vendor details in one easy-to-access place. When you open the Vendor Center, you’ll see a list of everyone you pay for goods or services, along with options to view bills, payments, and purchase orders.
Why It Matters for Staying Organized
- Everything in One Place – The biggest advantage is convenience. By storing contact information, bill details, and payment records in the same location, you cut down on time spent searching for paperwork or scrolling through separate files.
- Reduces Errors – When all your transactions are recorded in one system, you’re less likely to make mistakes such as double-paying an invoice or missing a due date. This reduces late fees and vendor disputes.
- Clear Payment History – QuickBooks Desktop automatically connects your payments to the correct bills, so you can quickly see whether an invoice is paid, partly paid, or overdue. This can help you maintain good relationships with your vendors by staying on top of payments.
- Better Insights – By checking out the Vendor Center, you can see how much you owe and to whom. This information can be used to plan future expenses, budget more accurately, and stay alert to any significant changes in your cash flow.
Step-by-Step: Using the Vendor Center to Track Bills and Payments
Open the Vendor Center – Start by selecting Vendors on the top menu bar in QuickBooks Desktop, then click Vendor Center. You’ll be taken to a screen that shows all your existing vendors in a list.
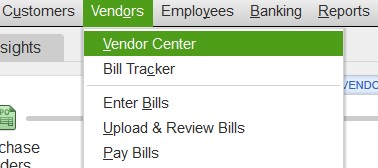
The Vendor Center is located under the Vendor menu
Add New Vendors – If you’re adding someone for the first time, select New Vendor at the top of the Vendor Center. Include the vendor’s name, contact details, and any other relevant information. This helps keep accurate records from the start.
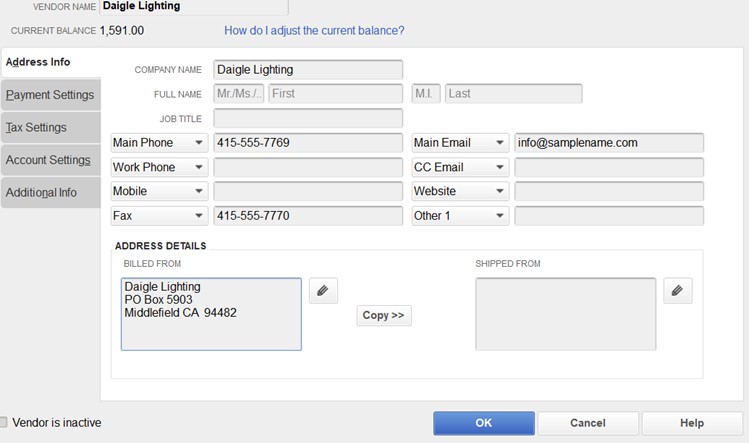
There are 5 tabs for entering vendor information
Record Bills – When you receive an invoice or bill, record it in QuickBooks by selecting Enter Bills from the Vendors menu. Choose the correct vendor from your list, and make sure to fill in key details like the amount, due date, and any notes you need for reference.
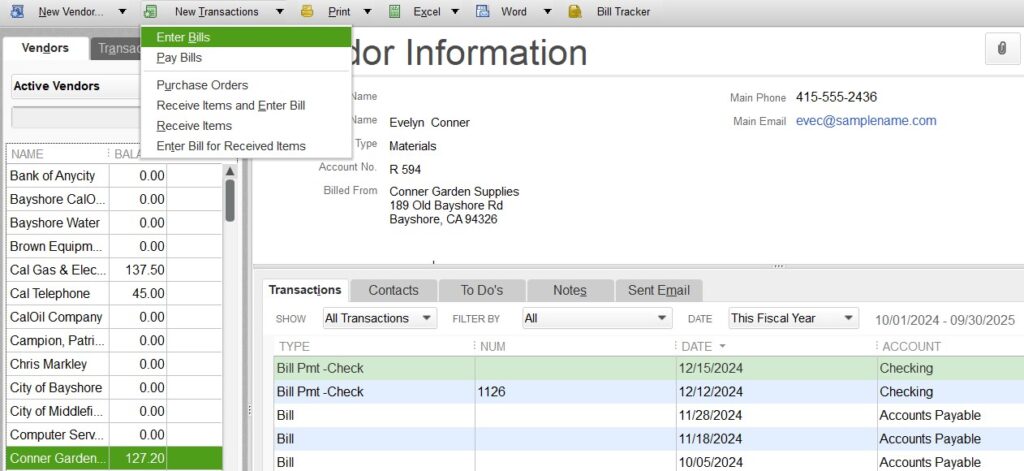
Highlight the vendor then click Enter Bills
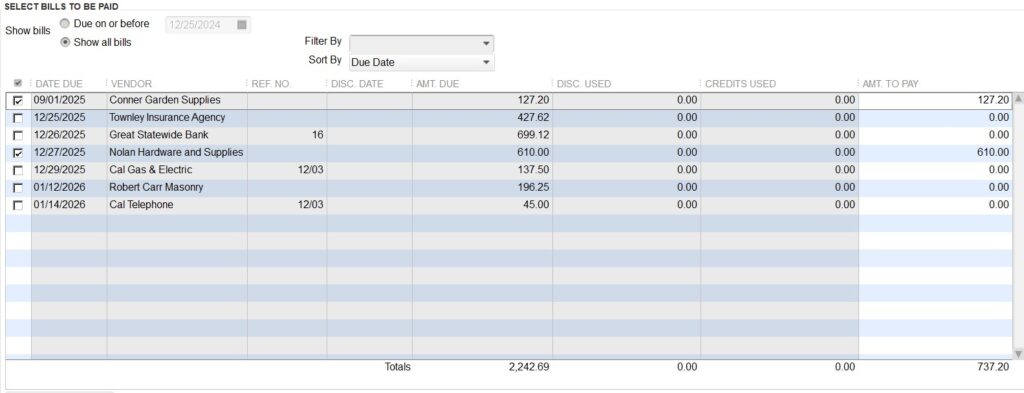
Pay Bills – To mark a bill as paid, go to Pay Bills in the Vendors menu. You’ll see a list of open bills, and you can select the ones you’re ready to pay. QuickBooks will automatically tie that payment to the vendor’s bill in the Vendor Center, keeping your records up to date.
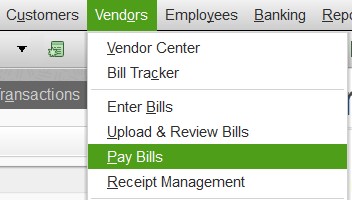
You’ll see a list of open bills, and you can select the ones you’re ready to pay. QuickBooks will automatically tie that payment to the vendor’s bill in the Vendor Center, keeping your records up to date.
Review Vendor History – After you’ve entered bills and recorded payments, you can see each vendor’s outstanding and paid bills by clicking their name in the Vendor Center. This gives you a clear snapshot of your payment history with that particular vendor.

Highlight a vendor to see their activity. You can sort the activity by date and transaction types.
Tips for Getting the Most Out of the Vendor Center
- Set Reminders: Take advantage of QuickBooks Desktop’s reminder features to alert you when payments are due. This ensures you never miss a deadline.
- Use Notes: Each vendor record has a space for notes. Use this section to log special details like contract agreements or important reminders.
- Keep Info Updated: Make sure your vendor details—addresses, phone numbers, and other key information—are always up to date. This saves time and helps avoid confusion.
- Run Vendor Reports: QuickBooks Desktop offers standard reports that show details like open bills or recent payments. Checking these reports regularly helps you stay on top of any changes in your payables.
By entering bills promptly, marking payments accurately, and reviewing vendor histories, you’ll gain a clear view of your vendor accounts—helping you avoid mistakes and late fees while making better decisions about your spending. The Vendor Center is a handy tool for keeping all vendor activity organized and easy to manage.
