Use Billable Expenses to Keep Projects Profitable in QuickBooks Online
If you ever find yourself covering costs for a client project—like picking up materials, hiring a subcontractor, or traveling for a job—those are expenses you’ll want to get reimbursed for. QuickBooks Online (QBO) has a handy feature that makes this simple: Billable Expenses.
Let’s walk through how it works and why it can help you stay on top of your client billing and project profitability.
What Are Billable Expenses?
Billable expenses are costs you incur on behalf of a client that you plan to charge back to them. Instead of trying to remember to add these costs later, QuickBooks lets you connect them directly to the client or job. When you’re ready to invoice, the system reminds you what you haven’t billed yet.
Examples include:
- Supplies or materials for a client job
- Payments to subcontractors
- Mileage or travel costs related to a project
Tracking these properly ensures you get reimbursed and protects your bottom line.
How to Turn On Billable Expenses in QuickBooks Online
To enable this feature:
- Click the Gear icon in the upper right
- Choose Account and Settings
- Select the Expenses tab
- Under Bills and expenses, turn on Make expenses and items billable
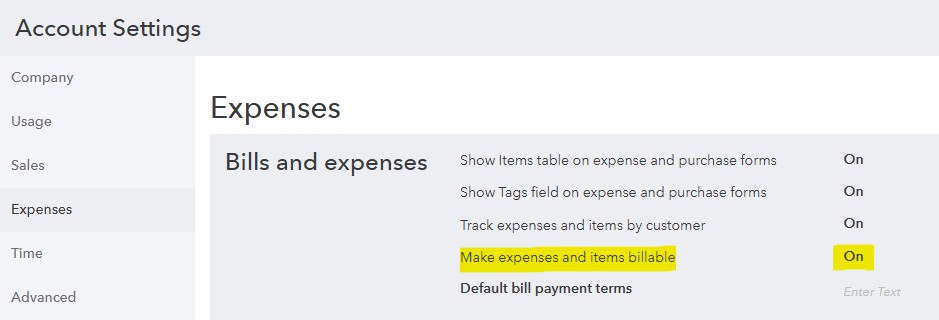
- (Optional) Set a default markup percentage
- Click Save, then Done
Once it’s turned on, you’re ready to record and bill those expenses.
How to Record a Billable Expense
When you enter an expense:
- Click + New, then choose Expense, Bill, or Check
- Enter the vendor and details
- Check the Billable box
- Choose the customer or project
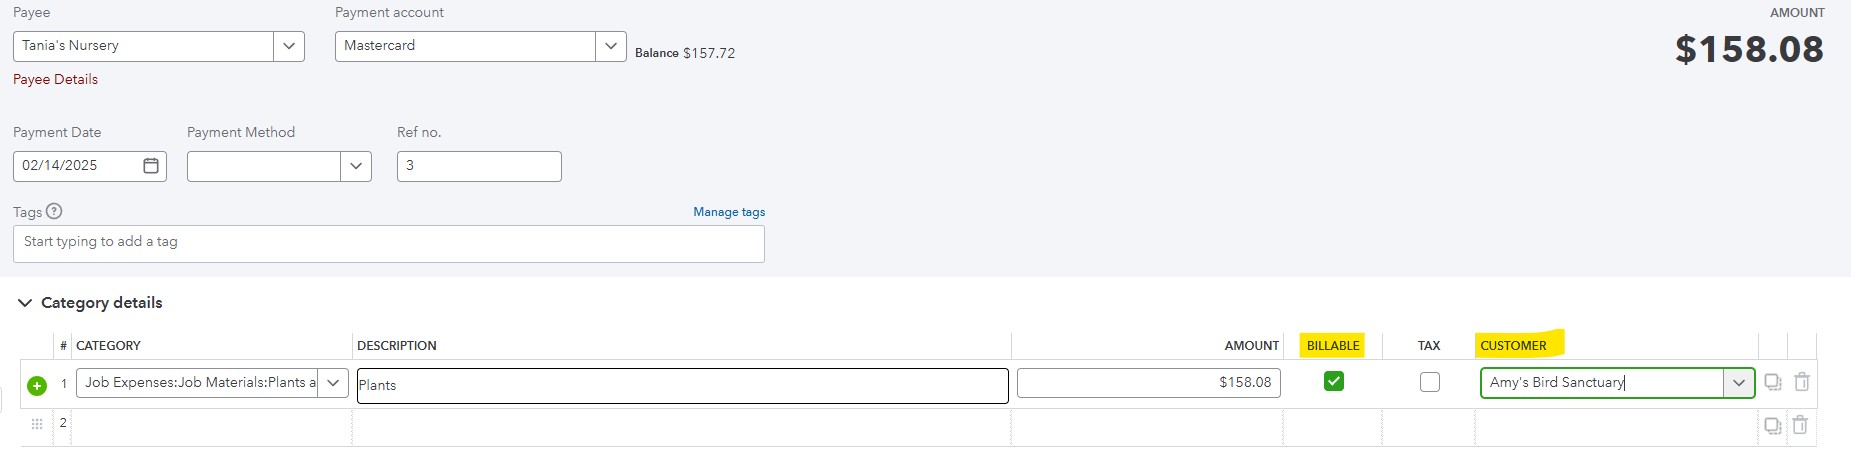
- (Optional) Apply a markup
QuickBooks tracks it so you can invoice the client later.
Invoicing the Client for Billable Expenses
When you create an invoice for that customer, QBO will show you any billable expenses.

You can:
- Add them with one click
- Adjust the amounts or remove if needed
- Include a note or description
This helps ensure you don’t miss a reimbursement.
Stay on Top of Unbilled Expenses
To track what hasn’t been invoiced:
- Use the Unbilled Charges report
- Run the Time Activities by Customer report (you can filter this report by billable – Y/N)
Both reports help monitor what’s outstanding and keep your records accurate.
A Few Tips to Consider
- Link the client or job to the expense at the time of entry—don’t wait
- Communicate clearly with clients about what you’ll bill for
- Review reports monthly to catch anything you might have missed
- Consider using classes or locations for extra tracking if needed
Final Thought
Billable Expenses in QuickBooks Online may seem like a small detail, but it can make a big difference in how accurately you invoice clients and how clearly you see your project profitability. With just a few steps, you can create a cleaner workflow, capture every reimbursable dollar, and run your business with greater confidence and clarity.