How to Set Up and Manage Memorized Transactions
Memorized Transactions in QuickBooks Desktop are a great way to save time and stay on top of recurring bills, invoices, journal entries, and more. Whether you have monthly rent, regular utility payments, or consistent customer invoices, memorizing these transactions helps avoid repetitive data entry and reduces the chance of missing something important.
This post will cover:
- What memorized transactions are and why they’re helpful
- How to set them up
- How to edit or delete them when you no longer need them
- A few things to watch out for
What Are Memorized Transactions?
A memorized transaction is a template for any recurring transaction you use in QuickBooks Desktop. Instead of entering the same transaction repeatedly, QuickBooks can remind you to enter it—or enter it automatically—based on your schedule.
Benefits of Using Memorized Transactions:
- Saves Time: No need to re-enter the same details over and over.
- Reduces Errors: Minimizes the chance of typos or missing important fields.
- Keeps You Organized: Ensures regular payments and invoices are handled on time.
- Automates Routine Tasks: Great for rent, monthly bills, payroll entries, or customer invoices.
How to Set Up Memorized Transactions
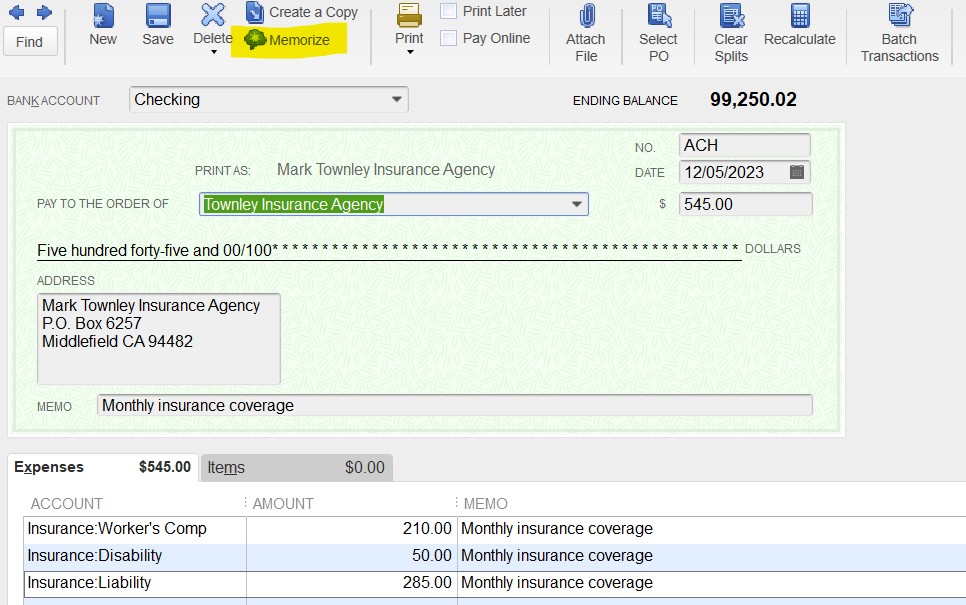
- Enter the Transaction:
- Start by entering the transaction (bill, invoice, check, journal entry, etc.) just like you usually would.
- Select Memorize:
- You can find the Memorize button along the top of the transaction

- Choose Your Preferences:
- Automate or Remind?
- Add to my Reminders List: QuickBooks will remind you to enter it.
- Do Not Remind Me: You can enter it manually when needed.
- Automatic Transaction Entry: QuickBooks will enter it for you on the schedule you set.
- Set Frequency:
- Choose how often (weekly, monthly, etc.) and set the next date.
- Automate or Remind?
- Click OK:
- QuickBooks will save this template in your Memorized Transaction List.
How to Edit a Memorized Transaction
- Go to Lists > Memorized Transaction List.
- Find the transaction you want to change.
- Right-click on it and select Edit Memorized Transaction.
- Adjust any details—such as frequency, amount, or next date.
- Click OK to save your changes.
How to Delete a Memorized Transaction
- Go to Lists > Memorized Transaction List.
- Right-click on the transaction you want to remove.
- Select Delete Memorized Transaction.
- Confirm the deletion.
A Few Things to Watch Out For
As helpful as memorized transactions are, they’re not always a perfect fit for everything. Here are a couple of things to keep in mind:
- Details Can Get Stale: If the amounts or other details change often, it’s easy to forget to go in and update them. You might end up with old info getting entered by mistake.
- Set It and Forget It? Not Always Great: If you’ve got automatic entries turned on, it’s easy to miss them if you’re not keeping an eye on things. They can slip through and throw off your numbers if they’re not right.
Final Thoughts
Memorized transactions in QuickBooks Desktop can be a time-saver for recurring tasks. Still, like any tool, they work best when reviewed regularly. Set them up carefully, check them now and then, and they’ll help keep your books running smoothly without the hassle of repetitive data entry.
