Tips for Customizing the Desktop for Better Workflow (QuickBooks Desktop Version)
Getting Around Quickly
QuickBooks tries to accommodate different work styles and preferences by providing multiple navigation methods. These are:
- The menus above the home page tool bar.
- The home page’s icons.
- The Icon Bar that appears in the left vertical pane by default (you change its position by opening the View menu).
If you are going to use the Icon Bar, we recommend that you set it up to make your most often-used tools prominent. Right-click in the toolbar and click on Customize Shortcuts to open the Customize Icon Bar window. In the upper left corner, you will see a list of your icons as they are currently arranged. You can rearrange them by grabbing the small diamonds to their left with your mouse and dragging them to their new positions. You can also change their labels by clicking Edit, or if you do not need the icon you can Delete them.

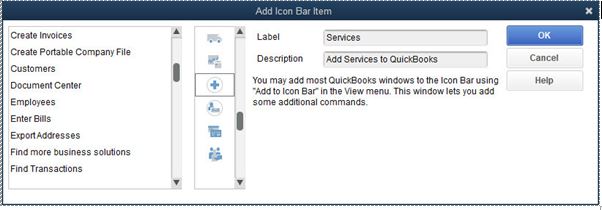
You are not limited to the items in the list. Click Add, and the Add Icon Bar Item opens, as pictured above. Click on any of the ones you want to include in the Icon Bar and then click OK. QuickBooks allows you to add almost any screen to your Icon Bar. Navigate to the window you want to add, then open the View menu and select Add…to Icon Bar. If you never use the Icon Bar, you can collapse it by clicking the small arrow to the right of the Search box at the top of the pane. You can also close the home page by clicking the lower of the two small X’s in the upper right.
Tile Your Windows
If you regularly work with the same handful of screens, there is a faster way to access them. Open them all, then open the Window menu (the gray tool bar at the top of the screen) and select Tile Vertically. All the windows will be displayed on the same screen, arranged vertically. Depending on how many you select, they may overlap. To activate one, just click on it. You can open it to full screen by clicking the small rectangle in the upper right and return to your vertical arrangement by clicking the double rectangle in the upper right.
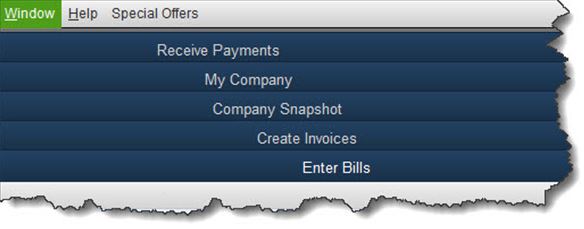
If you would prefer, you can Tile Horizontally. You can also click Cascade to display them stacked on top of each other with only each window’s title label showing, as shown below. If you want to go back to a blank screen and start over, click Window | Close All. The Window menu also displays a list of open windows that can be used for navigation.

The Desktop View
Another way to customize QuickBooks is to edit preferences. Open the Edit menu (the gray tool bar at the top of the screen) and select Preferences, then Desktop View. Click on the My Preferences tab if it is not already highlighted. There are several preferences here. Look under the Desktop heading. You can have QuickBooks open to the configuration of windows you want. Your options are:
- Save [the windows that are already open] when closing company.
- Save current desktop (a specific set of windows).
- Don’t save the desktop (always open to just the home page).
- Show home page when opening a company file (the home page will automatically open when you start QuickBooks)
- Switch to colored icons/light background on the Top Icon Bar
- Company File Color Scheme you can change the color scheme. (Helpful if you have multiple company files).
Click the Company Preferences tab to add or remove icons from the home page. This is also, where you turn features on and off.
Personalizing your workflow by customizing your desktop can save you time, which is always a good thing!
